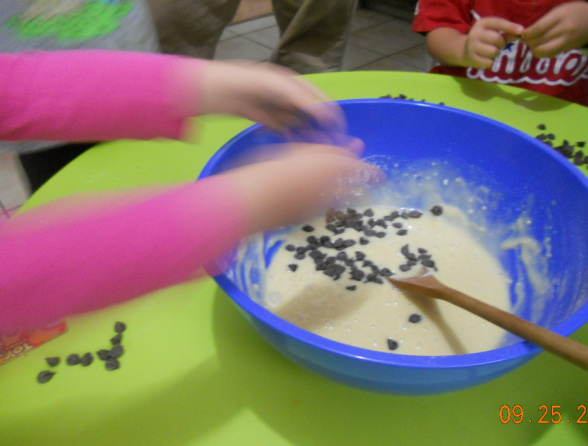
We did a little family baking the day before Yom Kippur, and my 6 year old requested chocolate chip bread. I wasn't really sure what that was, so I improvised - chocolate chip loaf cake. The kids were talking about different Yom Kippur things they had learned in school and one of my kids correctly noted that we had not yet gone to do tashlich*. So we did. Kind of. Each child took a turn and threw their chocolate chips into the batter, and they called the cake, Tashlich Cake. And I have to say, it was quite yummy and the perfect break-the-fast cake with, if you're me, a cup of ice cold orange juice. If you're my mom, it went well with a cup of coffee and if you're my 14 year old male cousin, it went well with, well, nothing, except two hands shoveling it into your mouth. Here's the recipe we used: 1 cup oil 1 1/4 cups sugar 4 eggs 2 cups flour 1/2 tsp baking soda 1/2 tsp baking powder 1 1/3 cup orange juice 1 1/2 cups chocolate chips. Preheat the oven to 350 degrees. Combine all the ingredients, except the chocolate chips, in a large bowl. We mixed by hand, no need to haul out the mixer for this one. Fold in the chocolate chips. Divide the batter between two loaf pans. Bake for 30 minutes or until the center is firm and a toothpick comes out clean. Let cool and then run a knife around the cake so that it does not stick to the pan. Can be stored, covered, at room temperature. *Tashlich? I'll explain. Tashlich is a ritual performed anytime between the first day of Rosh Hashana and Hoshana Rabba, which is the last day of Succot. Special prayers are said while standing next to a moving body of water, like a stream or a river. As kids, we always threw little pieces of bread into the water to symbolize throwing away our sins, but as we grew up, we learned that that wasn't really part of it. But at least the bread throwing made if fun for little kids. Right or wrong, my kids throw bread and love it. You can read more about Tashlich here too.
Have you ever painted with a q-tip? No? You really should. Look what you can make.
Completed canvases, hanging on our porch. I picked four 8x10 canvases for my kids a while back and I wanted to give them a chance to experiment with color on their very own canvases. The problem: the 8x10 canvases are small when faced with a kid and a paintbrush. They would have covered their canvases in a matter of minutes, most likely with all the colors running together to create a lovely brown. So instead, we used q-tips.
And it was awesome. And not just because the kids painted for an hour but because the results are beautiful. The free-form child. The meticulous child. We used some Duck brand tape to "write" their initials on the canvases. Then they painted away, covering the tape with paint as well. Once the paint was dry (we gave it a good 24 hours), I removed the tape and presto, each child's initial popped out of the beautifully painted canvas. Before the big tape reveal. The "A" revealing itself! In retrospect, I feel like I might have had them paint the canvas a solid color first, let that dry and then taped off their initial, allowing them to paint the entire canvas again. That way each initial would have had some color in it as well, but you know, next time we can do that. These are awesome as is.
It's always a little weird that there's so much cooking involved in a Fast Day. And yet there is So Much Cooking to do. And it always makes me nervous - make chicken soup and everyone might wind up extra thirsty the next day. Boil some chicken and no one wants to eat it.
So this year, I moved away from the very traditional Jewish foods, just to see what would happen. We haven't eaten yet, but so far, it's been the simplest erev Yom Kippur meal I've ever made. You can prep the entire meal in way less than an hour. No photos today, we're cooking in a rush. Don't worry, we'll all just use our imaginations. I'll show you:
Menu: Challah Crockpot Vegetable-Lentil Soup Baked Chicken and Brown Rice Corn Muffins Sauteed mushrooms and onions Fruit Salad Brownies
Minute 1 Let's start at the beginning: challah. I pulled that out of the freezer. If you happen to not have any challah in the freezer, I'd go pick some up at the store. Today's not the day to start pulling out the kitchen-aid. Today's the day to figure out what you're going to do with the kids all day tomorrow. (Good idea: visit that secret closet in the attic and take a look at what hidden toys you can pull out for the day.)
Minutes 2-11 Next, set up the vegetable soup in the crockpot. I just put mine up at about 8am. Cooked on high for 5 hours, it should be ready around 1pm, a great time to start the serious erev Yom Kippur snacking - and while stuffing your face with handfuls of chocolate chips from the pantry sounds amazing, it's probably not the best way to start off a fast. A bowl of fiber-full soup is probably a better idea. You can have the chocolate chips after that bowl of soup.
Here's the how-to: 5 small onions, 3 of them chopped and 2 of them sliced 1 clove of garlic, crushed 1 cup lentils 3 red potatoes, washed and cubed 1 zucchini, washed and sliced 2 parsnips, peeled and diced 8 ounces mushrooms, pre-sliced 5 cups water a few shakes of Mrs. Dash's salt-free soup mix or you can use whatever favorite spices you have on hand.
Put all the ingredients into the crockpot - EXCEPT for the two onions you sliced . Cover and set it on high. Come back five hours later and have soup. The whole soup doesn't take more than 10 minutes to put together - these are all easy chop vegetables.
Minutes 12-20 Baked Chicken and Brown Rice Preheat the oven to 400 degrees. Pour 1 cup of instant brown rice into the bottom of a 9x13 pan. Open the package of chicken - I used a chicken already cut into 1/8ths. Rinse the chicken and remove the skin from the chicken pieces. A handy little tip: If you hold a paper towel in each hand and grip the chicken with one paper-toweled hand and pull the skin off with the other paper-toweled hand, it comes off quite easily. (And just an aside, I totally threw up in my mouth a little while typing that. If you know me at all, you know that touching, looking at and/or smelling raw chicken makes me gag, but I do it anyway. Mommies do so much for their families. Go us.)
Place the chicken on top of the rice. Wash your hands super-well. Pour a small amount of olive oil onto a (new) paper towel and rub it over the chicken. Sprinkle some garlic powder on top of the chicken. Next, pour enough cold water over the rice so that the water is visible through the rice. It might seem like a lot of water, but the rice will absorb it all.
Cover the pan with foil and place into the oven for 45 minutes. After 45 minutes, uncover the pan and let the chicken cook for another 15 minutes or until it's slightly browned and done on the inside.
Minutes 20-26 (includes some standing around) Sauteed onions and mushrooms Heat a tablespoon of olive oil in a large frying pan and add in the sliced onions - remember when you sliced those two extra onions before? Now is when you save time because you prepped all your onions at once.
Saute the onions for two minutes or until they start to get soft. Add in 2 containers of already sliced mushrooms (timesaver!). Saute the mushrooms and onions until everything in the pan is browned and soft and much of the liquid has evaporated. Normally, I would add in some frozen spinach, but many of the people who live in my house don't like spinach and I'm not in the mood to fight today.
Minutes 26-31 Corn Muffins The best part of these muffins - they're clean. I mean, except for the challah, so far all these recipes have been clean, but I feel like it's easy to make clean chicken and vegetables. Muffins, of any kind, are different.
The original recipe for these came from the back of the Indian Head brand cornmeal container. Here's the new one. Preheat oven to 400 degrees (and lookee, the chicken is already in the oven on 400 degrees!) In a large bowl, combine the following: 1 cup cornmeal 1 cup white whole wheat flour 1/2 cup honey 3 teaspoons baking powder 1/2 cup oil 2/3 cup pareve milk - I used unsweetened almond milk. You can also use soy milk or rice milk. 2 eggs
Mix all by hand - remember, no kitchen aid today. Pour into a greased 12-cup muffin tin. You can also use paper muffin liners if you don't want to have to work so hard cleaning the muffin tin later. Bake for 18 minutes - I checked them after 16 minutes and they were just about done then but my oven is a little weird.
These can also be made in a mini-muffin pan.
Minutes 32-35 Fruit Salad A fruit salad in three minutes? Yup. Wash some green grapes. Wash some purple grapes. Mix them up in a bowl and look at how pretty they are together. Wash one container of strawberries. Cut the stems off of the strawberries, slice them in half and mix them in with the grapes. Done.
Minutes 35-40 Brownies Warning: these are not clean eating brownies, but we'll all be okay. Open box of Duncan Hines. Follow the directions and bake. Lick the spoon when no one is looking.
Minutes 40-55 Clean up the kitchen, wash the dishes and drink a large glass of water. You haven't been drinking for the past hour, you're probably dehydrated. Finish your glass of water and have another - don't forget, you're prepping yourself for a fast.
Minutes 55-60 Take five minutes for yourself. Sit down in your now clean kitchen which smells awesome from all the yummy food cooking in the oven and the crockpot and think. Just sit and think about how your year went, and send up a big Thank You for all the goodness in your life.
Wishing you and your families a Gmar Chatima Tovah, and all the health and happiness and good things that life has to offer. Fast well!
If you have a little boy and are in the market for a birthday idea, take mine. This baseball themed birthday party was simplest birthday party ever thrown. While the princess party of a couple of weeks ago had a games-crafts-activties list a mile long, the baseball birthday party had just three easy steps: 1. Play baseball. 2. Hit pinata. 3. Eat cake. And that's it. Really. There were a few things we did to prep for the party, but they were no big deal: 1. Borrow bases. My neighbor had some so we were good, but I saw a set of bases online for $12. 2. Buy pinata and candy. My dad bought the former and Josh went to Shoprite for the latter. 3. Figure out party favors. I ordered punch balls (the kind of balloon that has a large rubber band at the end) from Oriental Trading. Lucky me, they had baseball themed ones. Even luckier, they were in the Less Than Perfect section. You know what else was in the Less Than Perfect section? Baseball tattoos. I know. It was awesome. 4. Order baseball themed cake from Costco bakery. Again my dad took care of that but he enjoys going to Costco. Otherwise, just order it on the phone. (Just as an aside: I truly enjoy baking birthday cakes for my kids, but I have to say that the lure of an entire sheet cake decorated for $18 is very strong. So I went for it.) 4 1/2. Josh mowed the lawn in the backyard. But it needed to be mowed anyway; this was just kind of an incentive. Here are some pics from the party. We hung the punch balls as decorations on the fence. We have these two 8 foot long wooden benches in the backyard. We set those up so that the team that was not in the field would have a place to sit and eat their snacks: Just some 16 ounce plastic cups filled with licorice, pretzel rods and popcorn. Each kid also got a water bottle as a drink. Making the teams was not as simple as we had though it would be. Josh had all the boys sit on the benches, and using his teacher skills, he went down the line saying, "you're on Team A, you're on Team B, you're on Team A...". Then he got to the last kid. "Okay. Team A, you're on the field first." And every single little boy ran to the field. My dad, the pitcher. He was awesome, making each boy feel like they were the greatest hitter ever - when really, he was just kind of throwing the ball at the bat and hoping for the best. My nephew, showing the younger boys how it's really done. The kids were so well-behaved. I don't know why I never thought of a simple baseball party before. Always funny: Diving for candy after the pinanta was smashed open. And here it is: the $18 baseball birthday cake from Costco. So worth it. Such a fun party. And such a fun day.
Rosh Hashanah is coming this Sunday night and being a two-day holiday, it needs a bunch of challahs. And lucky for challah bakers, as the holiday falls so close to Shabbos, there can just be a marathon baking session. Challah baked on Friday will still be fresh for Sunday. Works for me. So that's what I'm going to do now. And also deal with all four kids, all home from school with real or imagined ailments. But here's a look back at last year's Round Rosh Hashanah Challah Baking Tutorial. Remember to count your blessings and to offer up a heartfelt thank you. Wishing everyone a truly sweet New Year full of love, laughter, health and happiness. Shana Tova!
It took a few minutes, but I think I was finally able to explain to a bunch of four-year-old girls that if you kiss a frog, he'll turn into a prince, but not really and it's just all pretend because they all looked rather horrified.
Instead of playing Pin the Tail on the Donkey at our recent Princess Birthday Party, we played Pin the Kiss on the Frog, a cute little game floating around online.
At first, I felt like making this game might be more trouble than it was worth. In my head, I saw myself using a white piece of oaktag and either drawing a large frog and spending quite a while coloring it in green or using many pieces of cut up green construction paper and putting the whole thing together like a puzzle, and frankly, neither option appealed to me.
And then, walking around AC Moore, I realized that I could just buy a piece of green oaktag. So I did.
Draw a frog, cut out some shapes that kinda sorta look like lips and the game prep is done. Hooray.
The rules of the game, in case you cannot recall your childhood, are: 1. Tie a bandana around the first player's eyes. 2. Place a kiss (or tail) with a piece of tape into the player's hand. 3. Spin the player around three times and let them go, wandering around, trying to stick their piece to the frog (or donkey). The one who gets it closest to the target wins.
We did a little differently. The girls didn't want to wear a bandana so we let that go. And also, in our game, everyone was a winner - as soon as you taped your kiss to the frog, you got a Hershey kiss. My kind of game.
Everyone gets a cold and mommy can't write. It somehow doesn't seem fair that my kids get colds the first week of school, when they are just getting used to it. What we did do that seemed to help my four year old's transition a lot - and which, I think, had nothing to do with her getting a cold two days later - was to throw her a birthday party on the first Sunday after school began, or you know, two days ago. I was quite nervous about this princess party. I am infinitely more comfortable with making a lego or dinosaur or baseball* birthday party. This whole princess thing still feels new to me even though my older daughter is already four years old. To start with, we handed out princess themed invitations at school, complete with a line about coming to the party "dressed in your best princess costume for some non-messy fun". Which is the best kind of fun when you're wearing your good clothes. After all my worry, bordering on anxiety (Josh thinks I might need to see someone about this), the party turned out to be quite adorable. We began with the same activity all my birthday parties begin with - a bunch of crayons and themed coloring pages. We went with a Hello Kitty Princess coloring page from some free printable website. Google and you shall find. And that's what I did. There are many many sites devoted to princess parties, and funnily enough, each one seemed to have the same ideas. But none really went into the details of how to make the princess hats or how to make your own pin the kiss on the frog game. And that's why I'm here, for the excruciating details. And also so when it's your turn to make the princess party, you won't have to think. You're welcome. So today we're gonna learn how to make Real Princess Hats. Or how to successfully attach tulle to paper party hats.
And after much trial and error, I can tell you that this does not involve glue, even though I was quite sure it would. I just wasn't sure what kind. I tried Elmer's glue, Mod Podge, and a glue stick. None worked. I even, very briefly, considered a glue gun, but there was no way to get the glue gun inside the pointy part of the hat without needing medical intervention.
In the end, it's just going to be you and the tulle. And maybe, if you're neurotic, some Scotch tape. First, go out a buy some plain old party hats, in assorted solid girlie colors. Also, go buy a small roll of tulle, which is a type of netted sheer material, kind of what you might find a bride's veil made of. Except we bought pink instead of white. You can use whatever color you like. Cut pieces of tulle that are about 14 inches long and 2 inches wide from your roll of tulle. Now, if you look carefully at the very top of the party hats, you will see there is a small hole. This hole is way to small to accommodate the tulle, so using a pencil, widen the hole by gently sticking it through the bottom of the hat, all the way through to the top, opening the hole just a little. Once you've that done, you're good. Roll one of the short edges of tulle in your hand to form a point and stick the point through the hole on the top of the hat, letting about four inches of tulle come through the hole to the inside of the hat.
Why four inches? Because that's enough material so that when the point you made with the tulle unfurls inside the hat, the tulle will get stuck. And stuck tulle is what you want because then it won't fall out. I wasn't so sure about the whole sticking the tulle in the hole thing as I was not at all convinced that the tulle would stay put, so I added a small piece of clear Scotch tape to top of the party hat to keep things in place, but I'm not really sure it was necessary. Just as an aside, I made twenty princess party hats and it took about an hour. But I also had a two year old helper, so it may just take you a much shorter time to complete this project. I had big plans for these hats. I thought we'd glue jewels and foam flowers to the hats at the party, but on party day, we merely stuck princess stickers onto the hats. Much neater, much more controlled. And the girls were so busy with the hats, you would have thought they were taking the SATs. Either this is quietest group of four year olds ever or they were really into their hats. Next up: Let's play Pin the Kiss on the Frog! *That's this Sunday. Call me crazy but I like to bunch the parties together, get them over with all at once.
Oh my goodness. Those two weeks between camp and school can just suck the life out of you. But we survived. And the Two Lost Weeks have almost come to an end; school starts in the morning. The tears and nervous stomachs have already started, mine included. We worked out the secret signals we're going to use in the morning when we say goodbye at school. We packed the lunchboxes, backpacks and extra secret little toy to keep in your pocket. We even picked out our clothes for tomorrow. But something has been bothering me, almost like something is missing. I have been scouring the Internet, or let's be honest and just call it what it is - Pinterest - trying to find a back-to-school tradition that spoke to me, one that I could use year after year without it getting old. Or requiring too much planning. Or baking. Not in the mood for baking. And I have not been able to find anything. But then, about an hour ago, while I was sitting on the floor surrounded by three grades worth of school supplies, marking everything up with my trusty Sharpie, I realized that the solution to my problem was already in my hand. My Sharpie. Tomorrow morning, the first day of school, I would write a secret message on each of my children's palms. And that way, if they needed me during that very long first day of school, I'd be right there, in their hands. And truth be told, because I was planning on using a Sharpie, my message would most likely be on their hands for days to come. I'm psyched. I'm ready. And I even have my message figured out. MLA for my anxious second grader. MLY for my nervous first grader and MLT for my I-can't-sleep-I'm-so-excited-I-can't-wait-for-kindergarten Kindergartener.
The M stands for mommy, the L stands for Love and the last letter is each child's intial. I feel like this is subtle enough for my big boys who are too cool for kisses in school and fun enough for my younger ones who just want to be in on the action. I think I may just need to write a message on my own hand to get me through the the first-day-of-school worrying at home.
|