Picture
We have, thank goodness, a month of celebrations coming up, including birthdays - some milestone ones, anniversaries and graduations. And so we've begun prepping for them because when I wait until the very last second, nothing good happens.  

Putting aside my boys who are having their graduations at the end of this week for a minute, my dad's birthday** is the first biggie of the month  - and he's going to be 60 this year.  

We had some time the morning of Memorial Day when Josh went to play softball, so we painted boxes. I had these leftover cardboard boxes that we already used for another project, but I am pretty sure these are the last of the boxes. I'm a little sad about that, they have come in handy on so many different occasions.
Picture
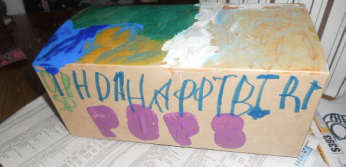
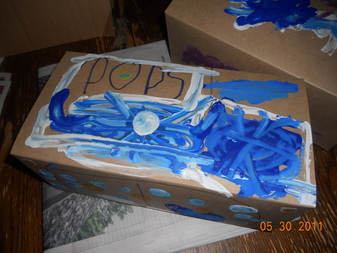
Anyway, so the kids painted the boxes and then we used stampers dipped in paint and alphabet letters cut out of sponges (bought, not made, don't worry), each child making his or her special box for Pops, as they call my dad.  

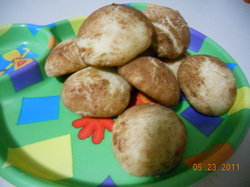
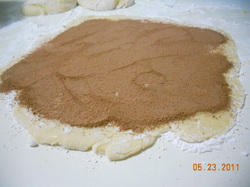
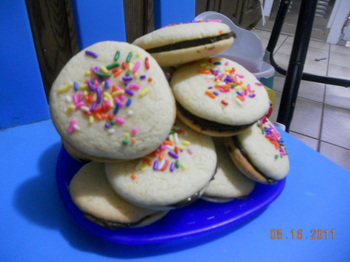
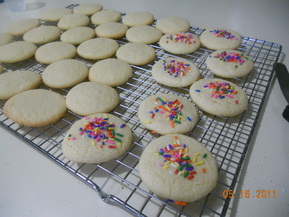
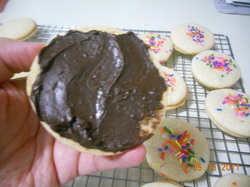
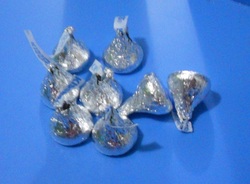
We are going to fill the boxes with homemade sugar-free cookies - a happy compromise for a guy with diabetes who loves baked goods.  

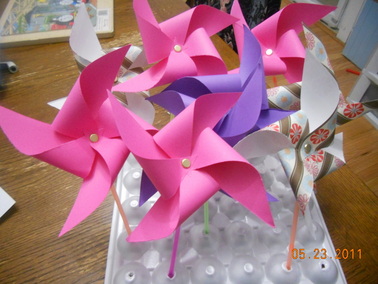
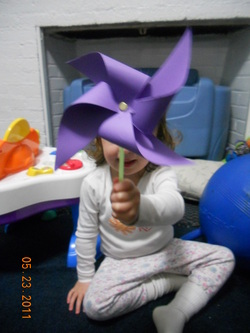
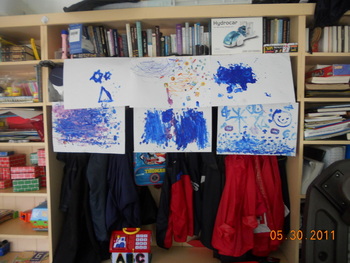
And while we were already painting, we made these to decorate the porch, using blue and white paint, in honor of the Israel Day Parade that is going to be taking place this coming Sunday in NYC and of Yom Yerushalayim or Jerusalem Day, coming at us tomorrow, June 1st. I can share these pictures with you because I know that you won't judge me on the state of affairs of my shelves. They need work, and time, way more time than I have at the moment. Just make pretend you don't see them.
Picture
And now I must continue the search for yummy sugar free cookie recipes. Do you have one? Care to share?  

*Cookie Tuesday will be back next week. I kind of forgot that today was Tuesday, I thought it was Monday - a day off on Monday always throws me off.

**I'm pretty sure my dad doesn't really read this, even though he says he does, so I can share...
Picture
 
 
A weird combination in that title, no? But you'll see, you can have super fun in the backyard with stuff that you already have.  

So my nieces and nephew came over on this pretty hot and humid morning and even though the kids' ages (7 of them) vary by a lot - the oldest is almost 12, youngest is just one, they really played together very nicely. And what did they play so nicely? They drag raced. Yeah, that's what I said. Drag racing in my backyard. It was really quite adorable.
  
Picture
My five year old and my 11 year old niece used chalk to divide the driveway in half, lengthwise. Then they took all my empty seltzer bottles from the recycling bin and lined them up in some sort of very specific way that only they understood. And then two kids at a time raced our hand-me-down ketcars down the driveway, slamming into the fence instead of using the brakes like G-d (and the manufacturer) intended. I'm just happy the fence is still standing.   

There was a lot of yelling, "on your mark, get set, go" and waving flags and seltzer bottles in the air. And a lot of cheering. It was pretty cute - and then they used the seltzer bottles once again to make trophies. They taped some construction paper onto the bottles , colored them and handed them out, one (or two) per person, so no one would feel left out.

Oreos and drinks for a snack and everyone was happy. So easy! And as my oldest just said as we were looking at pictures from the morning, "That thing, mommy, that thing we just did in the backyard before, that was awesome!"
Picture
 
 
Picture
Welcome to Cookie Tuesday: where we bake the cookies anyway, even though we can take one look at the dough and know they are gonna crash and burn. See? I share my failures too.  

Today's recipe was one that I have been searching for - for quite some time actually. My kids love rugelach but in general, rugelach are either made with a yeast dough (somewhat of a pain) or with shortening (gross). And so I have been looking for one that is made without yeast and without trans-fat. When I saw this recipe - made with no yeast and with oil - I should have known something was up. But I chose to ignore my radar and make them anyway.    

And here, sadly, is what happened. I mixed the dough exactly as the recipe was written, which is unusual for me, but somewhere deep down I must have felt that if I deviated from the instructions the results would be worse than they were.  

I mixed together:
2 eggs
1/2 cup oil
1/4 cup sugar until creamy.  

I added
3 cups of flour
2 teaspoons of baking powder
1/2 cup of orange juice
1 teaspoon of vanilla  

These last four ingredients were added by alternating the wet and dry ingredients. The dough was then mixed until everything was incorporated. As instructed, I placed the dough into the fridge for one hour. But even before I did that, I knew something was off. The dough was just so sticky, there was no way that an hour in the fridge was going to help. Spending the night in the fridge wouldn't help this dough. But I persevered. And also, I couldn't bake anything else while this dough was in the fridge because the dough was in the bowl from my kitchen aid. So I wiped the counter down and let it be. And besides, it was time for the baby to have a bottle and for the older one to nap, so leave the kitchen we did.  

An hour (okay, more like three hours) later, we came back. As per the instructions again, we floured the counter and dumped out the dough onto the floured counter - except it wouldn't come out of the bowl. It was so sticky that when I turned the bowl completely upside down, the dough did not even move at all. It just stayed there, stuck to the bowl like a sweaty fat man on a leather couch*. I scraped the dough out onto the counter, dumped a truckload of flour on top and mixed and kneaded, which I was quite peeved about because if I wanted to knead something, I would have just made a yeast dough.  

Anyway, finally, finally, I was able to roll it out into a rectangle. Now, I have made rugelach before and one would normally roll the dough into a circle because rugelach are made by cutting a circle of dough into 8 or 12 triangles (crisscrossing the dough with a pizza cutter - if that helps with the imagery), spreading filling on top and then rolling up each triangle, starting at the bottom of the triangle and rolling towards the tip of the triangle. Make sense? I wish I had a picture to show you, but alas, I could not cut triangles from this dough. All I got was the rectangle. This rectangle, actually:
Picture
But okay, I could work with a rectangle. I figured I would spread the filling (in this case, a mixture of equal parts sugar and cocoa) over the rectangular dough and roll the dough up, jelly-roll style, with the plan being to then cut the jelly-roll into slices and bake then like that. 

Except that the dough must have forgotten how much flour I had already added to it because it was still stuck to the counter. At that point, it was already 2:30pm and I have to get my boys from school at 3pm. What to do? So I scraped the dough back up, filling and all, and rolled small pieces into balls and placed them on the cookie sheet that has been waiting so patiently to bake some rugelach. Oh, and I dipped each ball into more of the filling mixture before putting it on the cookie sheet.   

The cookies baked in a preheated 350 oven for 15 minutes. They looked exactly the same coming out as they did going into the oven. Not such a good sign. But Josh was brave. He tasted one. And he said they weren't bad. He even asked if I could make them again. I said I could try, but I really have no idea how much flour I mixed in there. Could be one extra cup, could be three.  But make them again, most likely, not.   

We will move on from here and give a silent prayer of thanks that  Tuesday is over. And also that Cookie Tuesday only come around once a week. So. Much. Pressure.      

*Are you laughing? Cause I was. For a long time. That was Josh's editing there. My original sticky dough analogy was "like doody on a potty". I'm still not sure which is more inappropriate and/or disgusting, but there you have it.
Picture
 
 
Picture
So apparently, April Showers do not bring May Flowers. April Showers bring May Showers and drowned plants and mutant hostas*. It's been raining for days now and looking outside is like looking at a wet jungle. No one has mowed their lawns, no one has raked any of the leaves that are covering every surface and for sure no one has weeded their gardens which means that those little suckers are popping up through the mulch that Josh painstakingly laid down himself. The sun will have to come out sometime, I just hope it doesn't bring a crazy hot summer with it.   

What? Oh, you're saying I'm not the weatherman. Yeah, I know. I also know I am not nearly skinny enough to be the weathergirl and so that is why the weather commentary ends here. But my point was that it's raining and so we can't go walking or pretend jogging** with the double stroller and so we needed an activity.  

And that's why, after much deliberation, we made pinwheels, using nothing but some paper, paper fasteners, scissors and straws. And a hole puncher.  
Picture
I first saw this on a very creative blog called Northern Cottage and I bookmarked it for a rainy day. I considered recreating for you, step by step, how I made these pinwheels with my girls on the living room floor but as I sat down to write out the steps, I realized that it was really already done for me - and for you.

Northern Cottage did such a fantastic job on her pinwheel tutorial that there was no where for me to go with mine but down. 
These were actually so easy to make once we got the hang of it that I had to wonder: if I made enough of these guys, could I generate enough wind with them in the backyard to take us off the electrical grid and save some money each month? Something to think about. 

Anyway, because I followed someone else's tutorial and didn't change it up at all, I will just share pictures of my fun, dreary-day brightening pinwheels - and then I will go have a hot chocolate, because even though it's almost the end of May, it's pretty chilly out there. I better hurry though, my girls feel asleep after trying to make those pinwheels turn. All that blowing knocked them out, but you know that never lasts as long as it should. 

*mutant hostas? Yeah, one lone leaf of my carefully planted hostas has decided to grow up instead of out like all its cousins. I'll take a picture and show you if it ever stops raining.

** to get skinny enough to be a weathergirl, obviously.
Picture
 
 
Picture
Ignore the potty in the background :)
We've been very busy potty training the past few days so I kind of forgot about Cookie Tuesday until just before. What to bake? What. To. Bake? Oh, and also, I didn't have too many ingredients in the house so the what to bake question was even more concerning than usual. 

Looking through the pantry and the fridge, I had only the basics - flour, sugar, oil, eggs, things like that. And then I saw it, in the back of the fridge, the very overpriced tub of chocolate spread I had bought for Pesach to try and lure the kids to eat something, anything. The tub was still pretty full, no one liked chocolate matzah - and can you really blame them? No. No, you can't.   

So using what we had in the house, we made sugar cookies that went from mixed to baked in less than 15 minutes. Then we sandwiched pairs of cookies together with the chocolate spread, and presto chango from plain sugar cookies to fun sandwich cookies! 
Picture
The how to: 
Sugar Cookie Recipe - 
2 eggs
2/3 cup oil
1 tablespoon vanilla
1 cup sugar
2 and 1/2 cups flour
2 teaspoons baking powder  

This is a really quick recipe, so preheat the oven to 400 degrees before you start. Lightly spray three cookies sheets with cooking spray. Combine the eggs, oil, vanilla and sugar in a standing mixer. Add the flour and baking powder and you are done. See? I told you to preheat the oven before you start.  

Using a teaspoon*, drop the dough onto the cookie sheets, stopping after each sheet to go back and actually roll the dough into balls with your (dry) hands. After all the dough ballies are on the cookie sheets, go back and gently flatten each cookie with the palm of your hand. Don't smoosh them too hard, they shouldn't be that thin. If you like, sprinkle half the cookies with sprinkles and bake for between 4-10 minutes. Four to ten minutes? That's a pretty wide range. Crazy, I know. But it all really depends on your oven and how big the cookies really are. Here's the real rule  - as soon as you see any browning whatsoever on the edges of the cookies, they are done. I don't care if the centers don't look done, they are.   
Picture
Let them cool for a few minutes and then transfer them to a cooling rack. Once the cookies are cool, use about 1/2 a tablespoon of chocolate spread to sandwich the cookies together. If you used sprinkles before baking, then use one sprinkle cookie as the top of the sandwich and one non-sprinkled cookie as the bottom of the sandwich.  

And wow, look, you're done - and Caillou is still on the TV! Does that show never end? Now, quick, look at your cookies. They look like you worked so hard and made a chocolate filling and everything. No one has to know, I certainly won't tell.  

*I initially wanted to make mini sandwich cookies and I kind of thought that I was. The balls of dough that I made were pretty small, all 36 of them. But the truth is, I could have made them half the size because they spread in the oven. Half-sized dough balls would have been mini. Oh well. These are actually kind of large sandwich cookies. I hope my boys won't be too disappointed when only one cookie shows up in each lunchbox.  
Picture
 
 
Picture
The Potty Train has come to town. Well, not so much a train, more like a cupcake. Confused? That's okay, I'll explain.

The time has come to potty train my two (almost three) year old. Trust me, it wasn't my idea. I've been through this twice before and I had no desire to re-enter the world of carrying a potty from room to room, asking every two seconds if anyone had to go, bribing with chocolate and worst, cleaning the car (insert gag reflex here). I thought I had more time. I figured we'd do this in the summer. But my little one had other ideas and this past Friday morning, she decided that the time had come. And so out came our old trusty Elmo potty - and his twin brother, the other Elmo potty - the car one.  

I hadn't used a sticker chart with my boys when they were potty trained. They were never into that whole non-edible incentive thing. They just wanted that promised Hershey Miniature and nothing else would do it. But my daughter, she's a smartie. Not that the boys aren't, they are too - but I am learning that there is just a huge difference between boys and girls. Huge.
Picture
And so I thought I'd use a sticker chart with her, combined with her beloved chocolate kisses. No Miniatures this time around - none of the kids liked the Mr. Goodbar. Why? I don't know. But I do know that I do, a lot. And so when one of the boys earned a Miniature, so did I. It wasn't pretty and I am still carrying the evidence around on my hips. I mean don't get me wrong, I love chocolate kisses too but I'm saving those for potty successes. The dang Mr. Goodbars were just there for the taking. And I took them.  

Where was I? Oh yeah, the sticker chart. I had had a thought to make a "potty train" - a little paper potty traveling on paper train tracks, all taped to the wall. Use the potty and the potty moved forward on the train tracks. Get it? Good. But she didn't like it, this little one with a mind of her own. The boys thought it was a great idea when I floated it yesterday, but she wanted a cupcake. A cupcake train? No. Just a cupcake.  

So we made a paper cupcake out of pretty scrapbook paper. I drew a large cupcake on a piece of paper, cut out the frosting part and the bottom muffin part and traced each one onto scrapbook paper. I cut each section out and glued them together, and there ya go, a cupcake. We hung it on the wall in the spot of her choosing. And for stickers, small round ones that stand in for sprinkles. Sprinkles? If you have been following along you will know that my little one is very afraid of sprinkles. Will not even look at a pastry item with sprinkles. But she is the one who called the stickers sprinkles. Maybe this is her way of working through her phobia. Much cheaper than non-insurance covered therapy. See, she is a smartie pants. Or panties, as the case may be.
Picture
 
 
Picture
And here they are, the long awaited flowers that won't make you sneeze or wheeze, and yet at the same time, are made of a handy dandy material that can be used for wiping noses should the need arise. The best of both worlds, if you ask me.  

These tissue paper flowers look hard (at least to me) and have always intimidated me. I tried making them once before from the Martha Stewart website but it didn't go well. Today will be Take Two. Let's see if these are post-worthy. Ah, who am I kidding. I'm gonna show you either way - if I work on it, I show it. And in the end, I made four different ones. I'm not sure I would use any of them in an actual centerpiece where company might be seated across from them, but I did stick one into the top of one of the windsocks that we made.    

Okay, so to start, gather five sheets of tissue paper in different colors. They don't have to be all different, they can be three of one color and two of another and you can alternate them. Also, and I won't tell anyone, but you really can use the same color sheet for all five sheets. I promise. Your flower will be just as pretty. 
Picture
Cut the sheets into approximetaly 5 inches by 15 inches and layer the sheets. Fold the pile up like an accordian, in medium size folds, maybe about 3/4 of an inch to an inch wide. And this is where I hit a wall. Do you fold the long side? The short side? Who knows? So I did it both ways.

If you fold the short side, you will have a smaller, tighter flower. If you fold the long side, you will have a larger, airier flower. But if you fold the long side, I would add two or three more sheets of tissue paper to the original stack because the larger flower looked a little empty to me.

Anywho, once they are folded, use a pipe cleaner and twist it around the center of the accordianed tissue paper. I know that a pipe cleaner is best, but I'll be honest, I didn't I have any, so I used a twist tie that came with the garbage bags. 
Picture
With a scissor, cut both end points of the tissue paper accordian into somewhat of a rounded or top of a leaf shape.
Picture
Next, unfold the accordian into a kind of fan shape and separate the layers of tissue paper to form the petals of the flower.
Picture
This is the smaller flower - the one that had the short side folded.
Now, if you had used a pipe cleaner, you would now have somewhere to attach your second (green) pipe cleaner to make a stem. A twist tie doesn't really lend itself to that because it needs to be twisted tighter. So instead I threaded some thin ribbon through the bottom of the twist tie and now my flowers are hanging from the ceiling. Okay, not really the ceiling, the chain from the ceiling fan - I couldn't reach the ceiling. But ceiling, ceiling fan, it's all the same.
Here are the other ones we made:
Picture
This is the bigger flower, the one that had the long side folded.
Picture
This one had the long side folded. It is a bigger flower and also had seven sheets of tissue paper instead of five.
Picture
 
 
Picture
Springtime is full of flowers and all things pretty - and sneezy. We have two full-blown allergy Sneezys (and they're pretty Grumpy and Sleepy too) in the house right now, and since we are spending a small fortune on allergy meds these days, we are going to be crafty with things we already have in the house, like tissue paper and paper towel holders.  

First up: A Windsock. Yeah, a windsock. I had the same question. What the heck is a windsock? Is it really a sock? That blows in the wind? Why would I want one? And is this what you do with the socks who lose a mate in the dryer? Cause if it is, then I have (literally) a drawer full of at least 100 socks searching for their partners, but somehow I don't think hanging them outside and watching them blow in the breeze is either pretty or helpful in finding their buddies.

As there were no pictures accompanying the windsock instruction that I found, I will share my version of a windsock, using all stuff we already had. But I said that already.
Picture
Take an empty paper towel roll (or a toilet paper if you want to make a smaller windsock) and use markers to color it - or paint if you are feeling the love, but I don't think I am today. You can use some stickers and have the little ones stick on the stickers or use foam pieces, preferably the sticky-backed kind so you don't even have to take out the glue.  

Can you tell it's a lazy day?  
Picture
Anyway, after it's all decorated, punch a few holes around one of the open edges of the paper towel roll and tie some pretty string/ribbon/yarn/streamers through the holes. Another way of doing this - and the way that I ultimately did it, was to give in and take out a glue stick. The ribbons that I tied through the holes weren't working for me. I didn't have streamers, but I did have tissue paper so I cut strips of tissue paper and used the glue stick to glue the tips of the tissue paper streamers to the inside of the paper towel roll. Makes sense?

Then turn the windsock over so the strings are hanging down. Punch two holes in the other end of the paper towel roll, opposite each other and run a string through them - a string that is long enough that when tied together at the ends can be hung from a nail or a hook outside and still dance away in the breeze.  
Picture
Okay, fine, I looked it up. You're welcome. According to mapsofworld.com, "a windsock is a common weather instrument used for measuring wind speed and direction." Obviously, a very necessary item for one to have hanging outside their window.  

A windsock. Everyone should have one of these. And now you do.  

Next up: Tissue Paper flowers. They don't make you sneeze - and if by some chance you do sneeze, then hey, look, it's made from a tissue!
Picture
 
 
Picture
This was a mommy-kid joint effort - but is there any better kind?
Continuing right along with our Yom Ha'atzmaut theme, we will be celebrating Israel's 63rd birthday, with (what else?) blue and white cupcakes.

Each year, around Yom Ha'atzmaut, the "in" cookie becomes the blue and white cookie (the colors on the Israeli flag), a take off of the beloved black and white cookie. I considered making those, but man, what a huge pain in the neck. I made them once and I think that was enough for me. 

So we'll make a knock-off today. A much much easier knock-off.
 
First things first, bake yourself a batch of Duncan Hines (what else?) cupcakes. Any flavor, any kind, doesn't matter. It's all good. And be sure to let them cool. We made the marble fudge kind because that's what we had and also because for many nights now, Josh and I both keep saying we need to go to Shoprite - and then we fall asleep. Doesn't matter where. The couch, the floor. If we're lucky, it's in bed. But usually not. So fudge marble it is.
Picture
Then we did this: We made the icing. A blue icing and a white icing, but first the white because the leftover white becomes the blue. You'll see. It's not hard.
Here is the icing recipe:
1 1/2 cups confectioners sugar
1 tablespoon light corn syrup
2 teaspoons fresh lemon juice
1/4 teaspoon vanilla
1 to 2 tablespoons water
several drops of blue gel food coloring gel (liquid is fine too if that's all you have on hand)

Mix all in a bowl, by hand, until smooth and there are no lumps from the sugar. Divide the icing in half and remove to another bowl. Tint half of it blue.

There was more than enough icing for 12 cupcakes. You could probably even ice 18 cupcakes with this amount of icing.

And decorate to your heart's content.

Allow the cupcakes to sit with the icing for a while, until the icing hardens. Sing happy birthday, serve and eat. And don't forget to wave your flag and raise your glass and all that.
Picture
 
 
Picture
So we've added another phobia to the list - my two year old is now scared of, not only sprinkles, but the wind. Yes, that's what I said. The wind. As in, "it's windy, mommy, we can't go for a walk". So, today, on this beautiful day, we stayed inside. And because it is Yom Ha'atzmaut, The State of Israel's birthday and Independence Day, we made some super quicky projects for my very very young ones.  

First up: Foamie Magen Davids.
At some point my mom had bought us a truckload of arts and crafts supplies and looking through them today, I found rectangle shaped foamie sheets with sticky backs. And so because we were standing at the windows looking at the wind, we decided to make magen davids (stars of david) to stick on the window. I cut the foamie rectangles into strips, took the backing off, and we stuck the strips onto the windows in the shape of the six pointed star.
 
Picture
The girls both stood on the radiator cover at the back window and did the sticking. We made one triangle from the very unevenly cut pieces and then another upside down triangle on top. And they had so much fun! And the cute part is that the foam is blue on the sticky side too so the magen davids can be seen from the backyard too, which I think the boys will get a kick out of.
Picture
And while we sat on the living room floor admiring our magen davids, we picked through a huge bag of beads looking for blue and white ones, the colors of the Israeli flag. We, (and when I say we here, I mean me, because these beads were pretty small and pretty much a choking hazard) strung the beads on stretchy bracelet string that I had found in this huge box of arts and crafts.
Picture
It's kind of blurry cause she wouldn't hold her hand still.
Except that it's not that stretchy because the baby managed to rip the string apart on one pull. So in case anyone was wondering, stretchy string is not so child friendly, and really, not that stretchy.  

After picking up all the beads before anyone got the idea that there was candy on the floor, we restrung the beads on a regular, unrippable ribbon that was thick enough so that the beads stayed put and made a necklace for my two year old. She's in love.
Picture
And then we painted with blue paint. But I'll share that tomorrow.
Picture