In an effort to do more arts and crafts with the two-year-old and less watching of the tv - her new fave - we painted. In a Ziploc bag. Which, I have to say, was the best. Because there was no mess and no cleanup, save for throwing the bag in the garbage.
 
I wish I could say that the whole painting in a bag was my brilliant idea, but sadly, it was not. I first saw it on KiwiCrate's Two Ingredient Tuesday idea page, a page I love to visit.
 
***

 We were looking out the window this morning, debating whether it was too chilly for a
walk, when my two year old noticed the leaves everywhere and commented about what a mess it was outside. What can I say, she likes a neat sidewalk. But she did like the leaves and all the colors, so a leaf project it was!
 
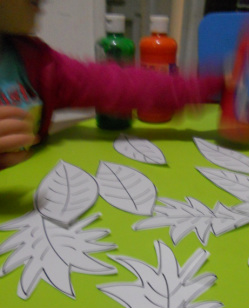
I gathered together some white construction paper, a black sharpie, a few resealable plastic bags and four paint colors of the little one's choice: red, pink, orange and green.
 
I drew a number of different shaped leaves on the paper and cut them out. 
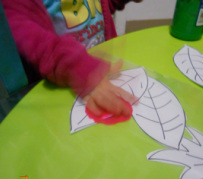
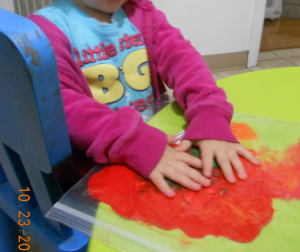
We then placed one or two leaves at a time inside the gallon sized plastic bag,
squirted a very little bit of paint inside the bag, sealed the bag and smooshed.
The little one really enjoyed moving the paint around with first one hand, then
both hands and then just the tips of her fingers.
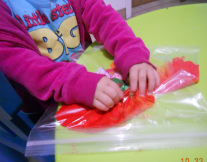
One note: be careful with the amount of paint you add to the bag. Too much and the leaf paper will rip. That happened to us a couple of times. In retrospect, I would have used white cardstock or any thicker paper but we didn't have any around.
 
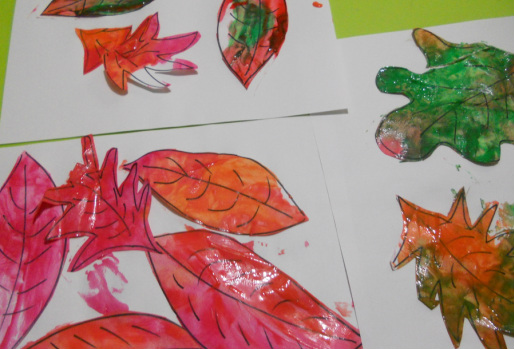
After each leaf was covered with paint, I removed it from the bag and added a new one. That part was a little messy, but I don't mind getting messy.
 
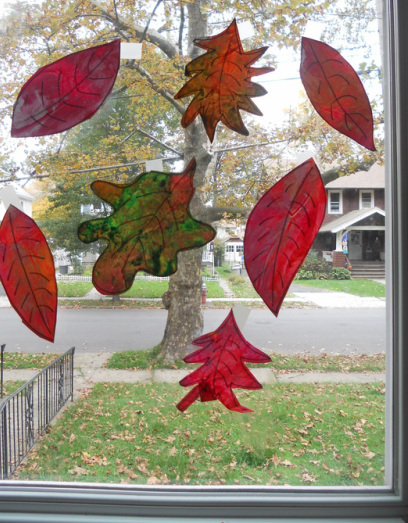
Allow the leaves to dry and then hang them up. We hung them on the front windows, but I could see these being pretty hanging from a mantle or on the molding around a doorway or even on a glass front door.
 
Happy Fall!   
 
 
Like much of the free world, we went pumpkin picking last week. We got
lucky though, the weather was beautiful, even a little hot for my sweatshirt
clad kids - (it looked so chilly that morning!) And our luck continued when we
got to the farm because Tuesday mornings are "free admission mornings" (yahoo,
those are Josh's three favorite words!) and there was almost nobody else there.
Perfect for my kids, they're anti-crowds.

And so now, a week later, I have a box of pumpkins sitting out on my front
steps, waiting for me to bring them in and introduce them to their new home. And
why are they outside? Because some of them were pretty dirty and my mom said I
should leave them out in the rain to get cleaned off. If you know my mom, you
can laugh now. If not, then don't you laugh at my mom! She's my mommy! 
 
Here are some pictures from the farm, probably more than I would normally
share but my blog hoster just unveiled a cool new slideshow feature and I need
to play with. Point your arrow over the big picture and you should then be able to click "play".
Next week: Pumpkin projects. Yahoo!
 
 
This is what greeted me when I came down to the kitchen this morning.
Almost scared the pajamas off of me, but the baby was so proud of herself,
feeding tea biscuits to the monkey's nose. And her little game kept her busy
while we baked a little while later.

You see, 'tis the season for pumpkins. And since Josh was gone for so long at
shul this morning, we made pumpkin  muffins. And mini muffins. And a pumpkin
bread. All from one recipe. Does it get better than that? Not from one 15 ounce
can of pumpkin, that's for sure. 
The first time I tasted anything pumpkin related, I was in California for
my uncle's wedding. In 1987. All the other kids were running around but my Bobby
Toby and I were sitting at the kiddie table, inhaling pumpkin muffins. My Bobby
Toby is no longer with us but for years, we had tried to recreate the same
delicious muffins we had had in 1987. And we couldn't. I think my Bobby's
problem was that she didn't bother to look for a recipe, she just winged it. I,
on the other hand, was always trying to make a "healthy" pumpkin muffin,
following different recipes, with flax seed and whole wheat flour. Then I pulled
out my old pumpkin bread recipe that I always tried to play around with and instead of using weird ingreidents, I just replaced some of the sugar with less sugar
and switched the margarine for oil. 
 
Instead of using the three cups of sugar that the recipe listed, I used two. Still awful, I know. But one taste of these muffins and I was back in California with my Bobby Toby, wearing my burgundy colored crushed velvet dress with white tights and shiny black mary-janes. And a matching velvet headband with a bow. Stuffing muffins into my mouth. Memories. These are deliciously unhealthy and definitely a once-in-a-blue-moon treat. Today must be a blue moon kinda day.
Here is the recipe, with my modifications:
1 15ounce can of pureed pumpkin, not pie filling
2 cups sugar
1 cup water or soy milk
1 cup oil
4 eggs
3 and 1/2 cups flour
2 teaspoons baking soda
2 teaspoons cinnamon
1 teaspoon salt
1 teaspoon baking powder

Preheat the oven to 350 degrees. Grease whatever pans you'd like to use. I
used one loaf pan, one muffin pan with 12 spaces, and one mini muffin pan with
24 spaces. 

In a bowl of a standing mixer (or by hand), mix the sugar, soy milk or
water, oil, eggs and pumpkin. Add the dry ingredients and mix until combined.
Pour half the batter into the loaf. Start baking the loaf pan right away because
that pan takes the longest, at about 50 minutes, but start checking it at 30
minutes to be sure the top isn't burning. I tented my loaf pan with foil at the
35 minute mark and left it like that until it was done, about 15 minutes later. 
 
Then pour the batter into the mini muffin tin and bake that on the other
rack. These take the shortest, coming in at about 11 minutes. Next fill the
regular sized muffin pan, move it to side and wash the dirty bowl and spoons. By
now the mini muffins should be done and the regular sized muffins can go in. The
regular sized ones took about 18 minutes to bake.

Let cool and eat. Or store in a Ziploc bag on the counter. Or wrap in foil
and stick in a labeled freezer bag and freeze. All good options. And just think
how lucky we are to have freezer bags to keep the food we work so hard on from
getting freezer burn. There were no dedicated freezer bags in 1987. That's why
we had to eat all those muffins. We were really just doing a service to the
hostess. 
If you like what you've read, please leave a comment!